
Connect a data source
Connecting a data source in Ronja is a conversation, not a form. Clicking Add Connection opens a chat with Ronja, which asks what you want to connect and walks you through the right flow for that service.
Start the conversation
Section titled “Start the conversation”- In the admin area, open Connections and click Add Connection. Ronja opens a fresh exploration and asks what service you’d like to connect.
- Name the service — “Connect Gmail”, “Connect our Postgres database”. You can also skip the Connections page entirely and just ask in any exploration.
- Follow the card Ronja renders: SaaS tools get a one-click sign-in card, databases get a secure credentials form.
The Connections table shows each connection’s name, connector type, feature, status and last sync. Open the connection name to manage it, or the feature name to see its data. Use Sync now or Stop sync on the row when those actions are available. If the list cannot load, Try again reloads it; a failed request is not an empty list.
If Add Connection cannot open the exploration, try the button again. A conversation that was already created is reused.
Example: a SaaS tool (Gmail)
Section titled “Example: a SaaS tool (Gmail)”- Ask Ronja to connect Gmail.
- Click Sign in with Google on the Connect Gmail (Read) card.
- Approve access in the popup window — the card shows “Waiting for authorization…” until you finish.
- Wait for the card to flip to Gmail (Read) connected. Ronja continues automatically.
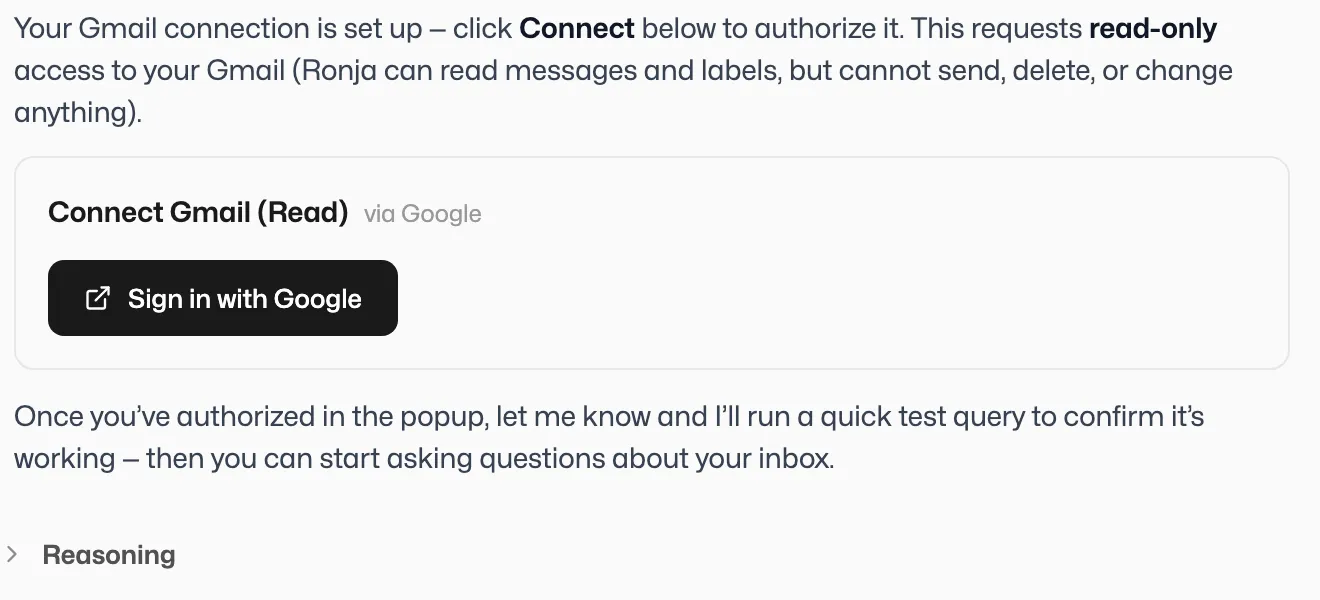 The one-click connect card Ronja renders for a built-in SaaS integration.
Example: a database (PostgreSQL)
Section titled “Example: a database (PostgreSQL)”- Ask Ronja to connect your Postgres database.
- The conversation pauses and a secure credentials card opens just above the message box. Fill it in: Host, Port, Database, Username, Password, and SSL mode. Password fields are marked “sensitive”; previously saved sensitive values display only as dots.
- Click Save credentials. The values are stored as a secret — the sensitive values are never displayed again anywhere in the product, and Ronja the agent never sees them. Ronja then resumes the same conversation, or click Skip for now to defer entering them.
- Ask your questions — Ronja can now query the database live in the conversation.
- Ask Ronja to set up a scheduled import if you want the data synced into Ronja tables (this step requires Admin), then choose which tables to sync on the connection page.
Synced on a schedule, or queried in place
Section titled “Synced on a schedule, or queried in place”There are two different things Ronja can do with an outside system, and which one you get depends on the system.
Synced on a schedule. Ronja copies the tables you choose into Ronja on a cadence you set, and keeps them up to date. She owns the bookmark that tracks how far she got, resumes a long run where it stopped, and lands each table in a feature as an Integration table — queryable, joinable, and there even when the source is not. There is no code for you to maintain. This is available for:
- PostgreSQL, SQL Server, MySQL and Google BigQuery — your own databases and warehouses. Ask Ronja in chat to set up a scheduled import and she does the rest.
- PostgreSQL (change capture) — the same database, connected a different way: Ronja reads its record of what changed instead of re-reading the tables, so every insert, update and delete arrives, collected on the connection’s schedule. It asks more of the database in return — see PostgreSQL change capture for what it needs and what it will not do.
- MySQL (CDC / binlog) — a MySQL database read through its binary logs, the server’s own record of every change, so updates and deletes arrive too. Ask Ronja for it by name; the ordinary MySQL import is what she sets up otherwise. The server needs binary logging in row format with
gtid_mode = ON, the account needs theREPLICATION SLAVEandREPLICATION CLIENTprivileges, and the server must keep its binary logs longer than the time between syncs plus the time a full copy takes — see Keep MySQL binary logs long enough. - MongoDB — also synced on a schedule, but Ronja cannot set this one up inside the chat. Ask her to import your MongoDB and she replies with a link to the New Connection page for MongoDB, where an admin fills in the Connection String and then picks the collections to sync.
Queried in place. For Snowflake, Oracle, ClickHouse and Amazon Timestream, Ronja runs your question against the source live and brings back the answer. Nothing is copied, so there is nothing to keep in sync — and nothing to query when the source is unreachable. PostgreSQL, SQL Server, MySQL and Google BigQuery can be queried this way too; for those four, a scheduled import is the extra step, not the only way in. MongoDB is the exception — Ronja imports it, but cannot query it in place.
If you need a stored copy of a source Ronja doesn’t sync, ask her to build a Workflow that reads it and writes a table on a schedule. That is your code rather than hers, so it is worth the trouble when the alternative is not having the data in Ronja at all.
SharePoint is reached with a secret. If your organization already has a SharePoint connection that Ronja support has approved, an Admin opens it and clicks Create SharePoint key (on any other connection the button answers “This SharePoint connection is not approved for a SharePoint key; contact Ronja support.”): that makes a secret for the Microsoft organization the connection already reads, which Workflows use to read files from the SharePoint sites your Microsoft admin gave Ronja access to, with no app of your own. The connection keeps syncing as before, Ronja renews the secret’s access by itself, and the button refuses with a message if your Microsoft organization is already connected to another Ronja organization. The secret lands in your private feature, so only your own Workflows can use it; to let other people’s Workflows use it, move it into their feature. Otherwise, the secret uses your own Microsoft app. Ask Ronja to connect SharePoint: your Microsoft admin registers an app for Ronja in your Microsoft Entra ID and gives it access to the sites she should read, you give Ronja its Directory (tenant) ID when she asks for it in the chat, and you enter its Client ID and Client Secret in the card she opens, then click Connect. To keep a copy of SharePoint files in Ronja, ask her for a Workflow that reads them on a schedule. A SharePoint connection set up earlier keeps syncing as before, but a new one can no longer be created, and one that was never connected can only be deleted.
Set the sync cadence
Section titled “Set the sync cadence”- Open the connection from Connections or from its feature.
- Find the Sync Schedule card — “Minimum cadence is once per hour.”
- Choose Interval (run every N hours; new connections default to every 24 hours) or Cron (Hourly / Daily / Weekly / Monthly / Custom cron presets, with a timezone).
- Click Save Schedule.
Keep MySQL binary logs long enough
Section titled “Keep MySQL binary logs long enough”A MySQL (CDC / binlog) connection continues each sync from the last change it read in the server’s binary logs. If the server deletes those logs before the next sync, Ronja cannot continue from where it stopped. So the server must keep its binary logs for longer than the time between syncs — every 24 hours unless you changed the Sync Schedule — plus the time a full copy of the connection’s tables takes. The first sync copies every table in full, and a large copy can take several syncs; the sync after it continues from where the copy started, so the logs must still reach back that far:
- Amazon RDS or Aurora: run
CALL mysql.rds_set_configuration('binlog retention hours', 168);(seven days). Until a retention is set, RDS and Aurora delete binary logs as soon as they can. Seven days is the most Amazon RDS for MySQL allows, so on RDS the time between syncs plus a full copy must stay under seven days; Aurora allows longer. - MySQL 8.0 and later: raise
binlog_expire_logs_seconds. - MySQL 5.7: raise
expire_logs_days.
If the logs are deleted anyway, Ronja pauses the connection rather than failing at every sync: it shows a red Stalled badge, Sync is refused, and a Replication stalled notification goes out — on by default, so your admins are emailed unless someone changed its recipients or turned it off on Notification routing. Change the retention first, then click Reset on the connection page (Admin): Reset removes the files Ronja synced for this connection, and the next sync reads every table once from your server and replaces the change history Ronja held for it. Reset before the retention change and the connection will most likely stall again at the first sync after that full copy. If your server cannot keep binary logs that long, ask Ronja to switch the connection to the ordinary MySQL import, which reads no binary logs: she removes the connection’s previous files first, then you pick its tables again. More in Fix data issues.
Where your tables land
Section titled “Where your tables land”Every connection belongs to a feature. Synced tables appear in that feature’s hub under Tables, marked with the Integration kind, ready to query in any exploration.
If a source’s authorization expires, the connection shows Re-auth needed and syncing stops — see Fix data issues.