
Set up your team
Ronja gets more valuable with every teammate in it. This page takes you from “just me” to a working team: invite people, give them the right roles, group them into an access group, and share the features they need.
Invite your teammates
Section titled “Invite your teammates”- Click Admin in the sidebar, then Users & Access. You land on a matrix — people as rows, access groups as columns. If your organization has more than one Space, the matrix shows the people and the access groups of the Space you’re in, and the page’s description names that Space.
- Click Invite users to open the invitation dialog. Inviting somebody joins them to the organization, not to the Space you’re in; which Spaces they are in is decided on each Space’s own page.
- Enter Email addresses, separated by commas or new lines. The button updates to Send N invites.
- Send. Each person receives an invitation email and appears in the matrix with an Invited label until they first sign in. Use Resend invite beside an invited member to send a reminder.
New members join with the least-privileged role, User Read-Only — they can view shared content and ask Ronja questions, but cannot create or change shared content. That’s deliberate: you upgrade them next.
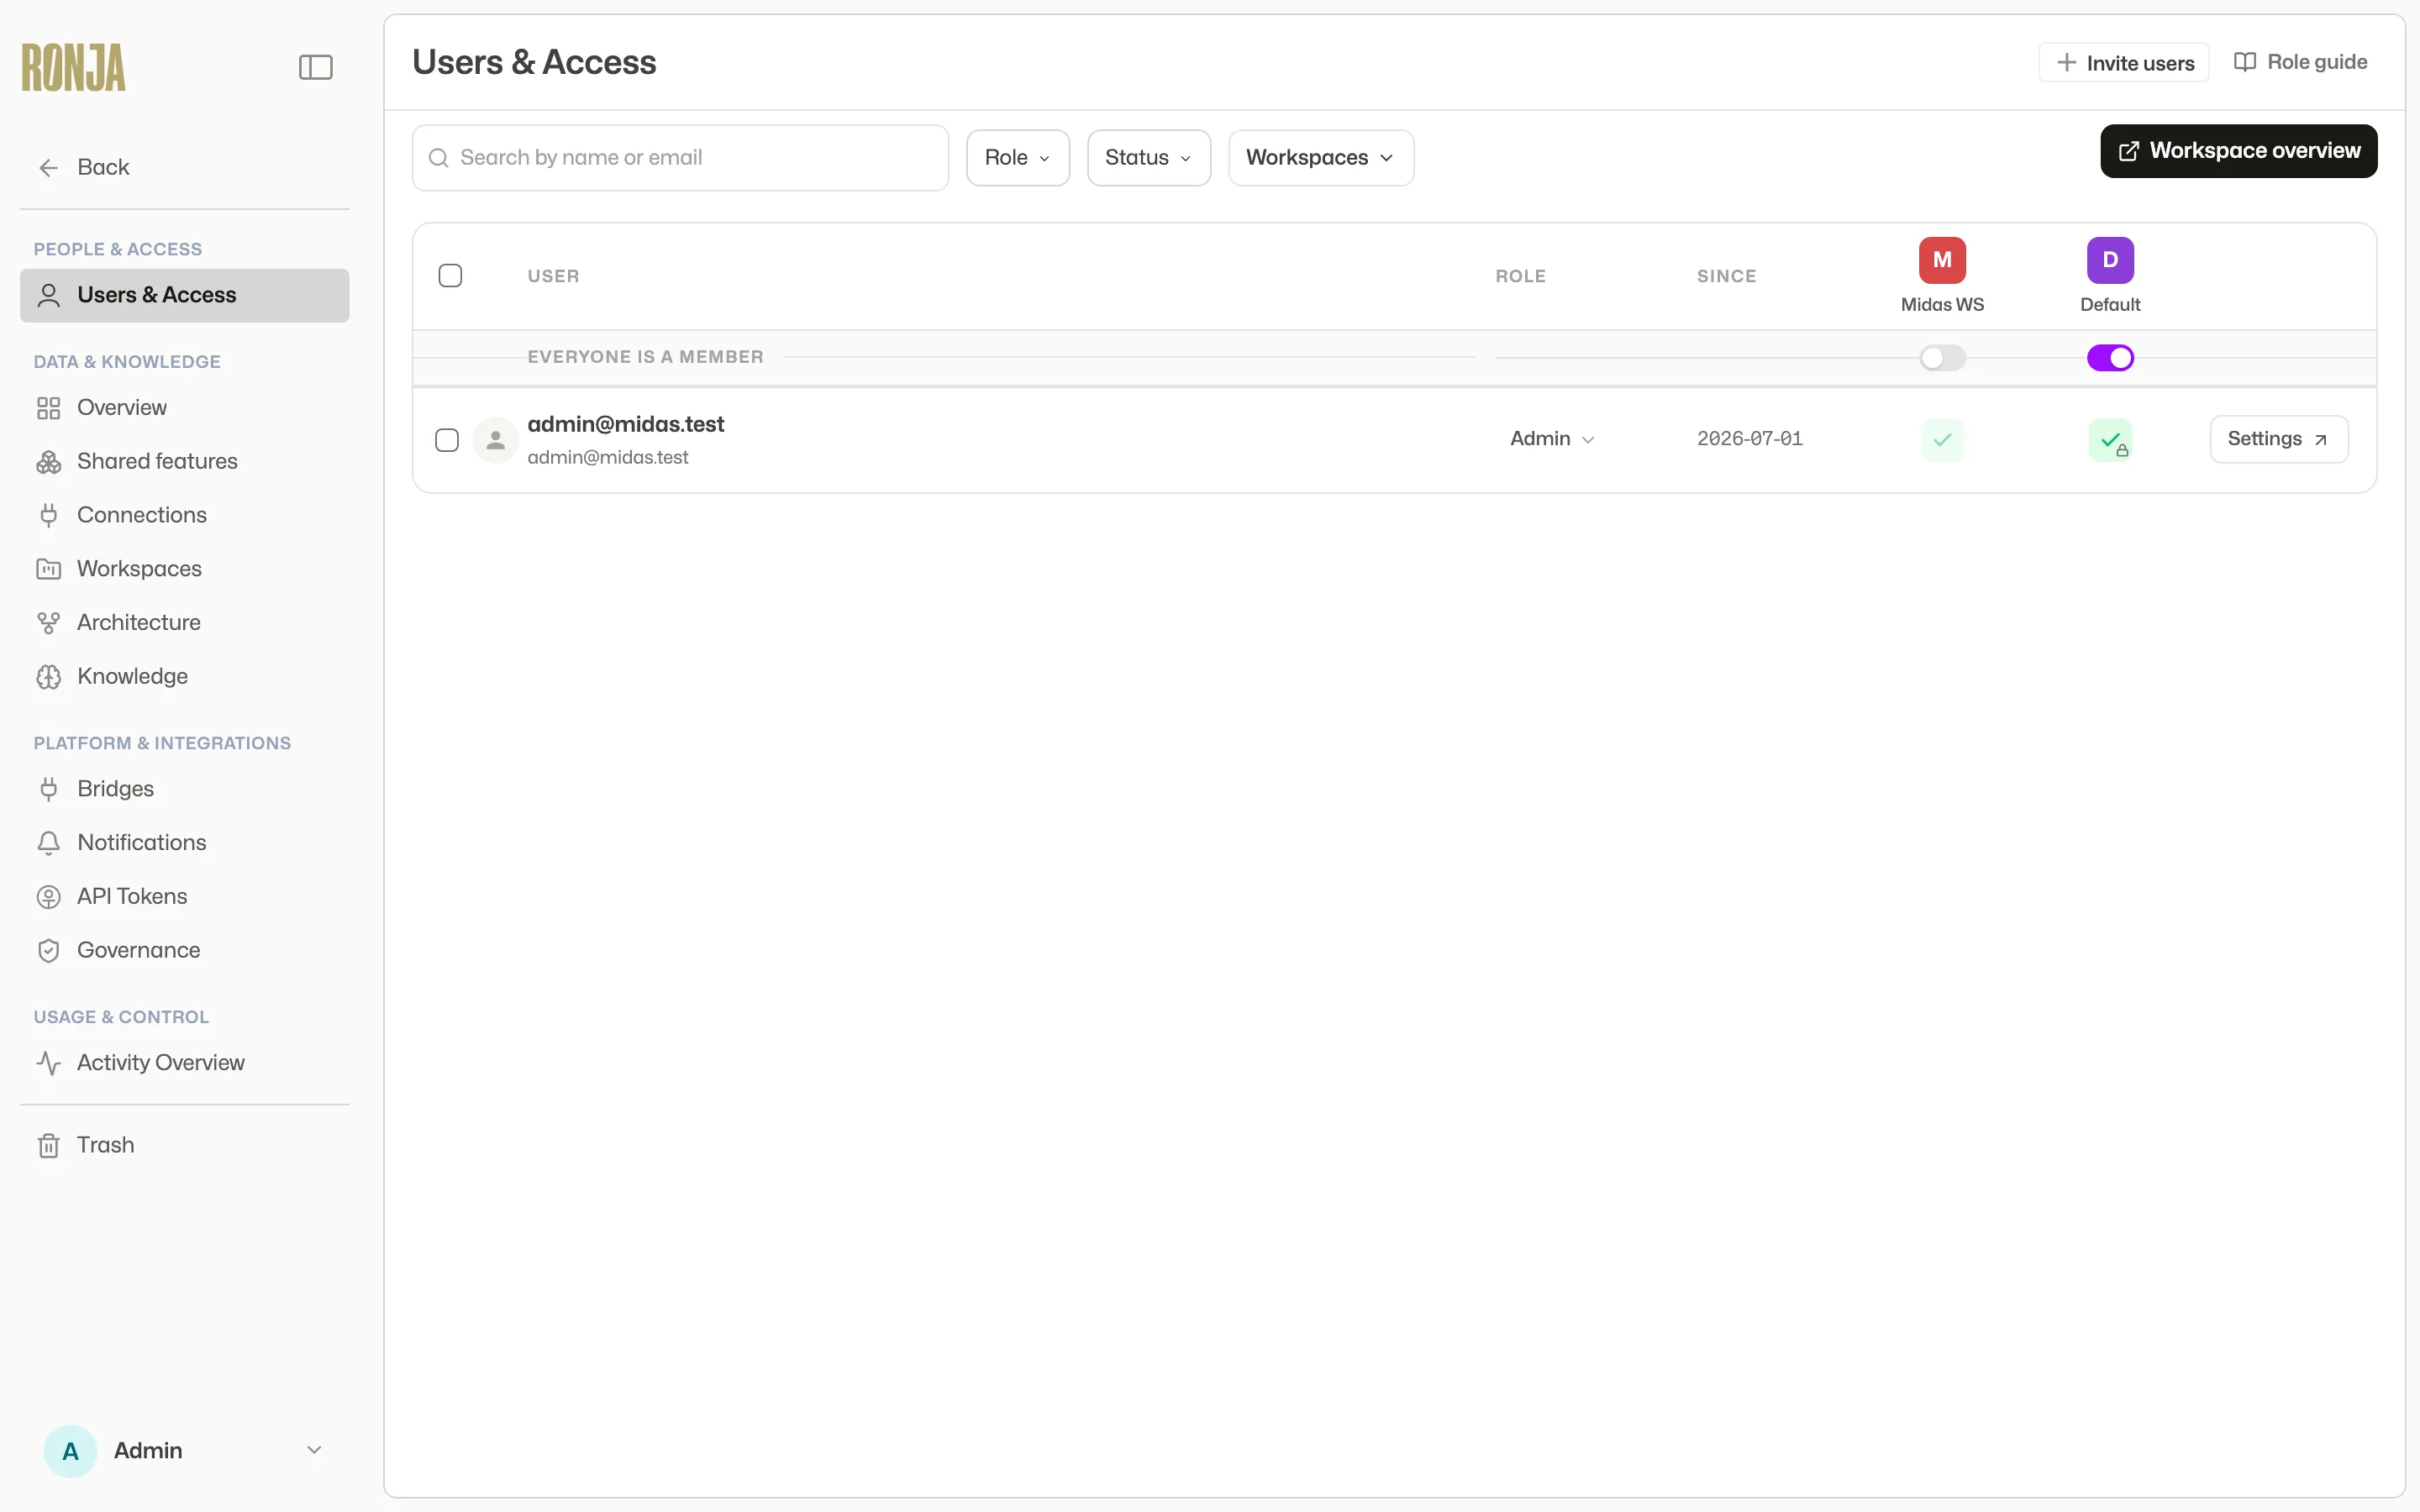 Users & Access — invites, roles, and access group membership in one place.
Pick roles
Section titled “Pick roles”- Click a member’s role control in their row.
- Choose a role from the dropdown. There are four: Super Admin, Admin, User, and User Read-Only. Most teammates should be User — they can explore, use everything shared with them, and create their own private work.
Two guardrails to know about:
- An Admin can grant roles below their own level (User, User Read-Only). Promoting someone to Admin or Super Admin requires a Super Admin.
- You can’t demote yourself if no one else holds your role or a higher one — promote someone else first.
For what each role can actually do, open the Role guide from the page header, or see Roles and permissions and the roles capability matrix.
Create an access group
Section titled “Create an access group”An access group is a team’s grouping: it groups people and decides which features — and therefore which data — they can reach. Every organization starts with one badged Default, which automatically includes everybody in its Space — in the one Space most organizations have, that is every member.
- In the admin sidebar, click Access Groups.
- Click New access group.
- Enter an Access group name (and an optional Description), then click Create access group. You’re added as its first member automatically.
Add people to the access group
Section titled “Add people to the access group”Two equivalent paths:
- Per person: on the Access Groups page, select the access group and open its Members tab. Click Add next to each teammate.
- In bulk: back on Users & Access, click the cell where a person’s row meets the access group’s column, and confirm with Add member. Select several rows with the checkboxes to use the bulk bar (Add to group, Remove from group, Change role).
Want everyone in, now and in the future? Flip the access group’s Everyone switch under its matrix column heading — new hires then join it without an extra invite step. It means everyone in the access group’s Space, and it does not put anybody into that Space.
Share a feature with the access group
Section titled “Share a feature with the access group”Access Group members see the features shared with that access group. To wire them up:
- In the admin sidebar, click Shared features.
- Select Access. Features are rows and access groups are columns; the legend identifies full access, selected resources and no access from that group.
- Select the cell where the feature meets your access group.
- Choose Full access, or choose Selected resources and select the resources the group needs.
- Select Save changes.
In Access, green checks mean full access, amber half-circles mean selected resources, and outlined dashes mean no access from that group. Muted marks with locks identify inherited access. Select any cell to inspect it. Drag the divider after Feature, or choose Fit names, to read longer names.
Use Browse to read each feature’s purpose, see its maintainers and inspect its sharing summary. Search, Tag and Maintained by filters carry across both views.
Use the All features switch beneath a group’s name, then confirm the change. This policy includes current and future shared top-level features automatically. A cell with inherited full access explains the policy instead of offering an individual override. To give a group every feature except a few, turn All features off: the group keeps full access to every feature it had, now as individual grants, and you then choose No access from this group on the features to exclude. Features shared after that are not added automatically.
No access from this group removes this group’s grant. Members can still receive access through another group. In particular, if Default includes everyone and shares all features, narrowing a different group’s grant does not remove that access. If you change a group that includes everyone, the Feature access details remind you that the change applies to everyone, and say what everyone gains or loses when you change its level of access.
Only organization-scope features can be attached this way. A member’s private feature reaches the team through a handover request instead — see Scopes and sharing.
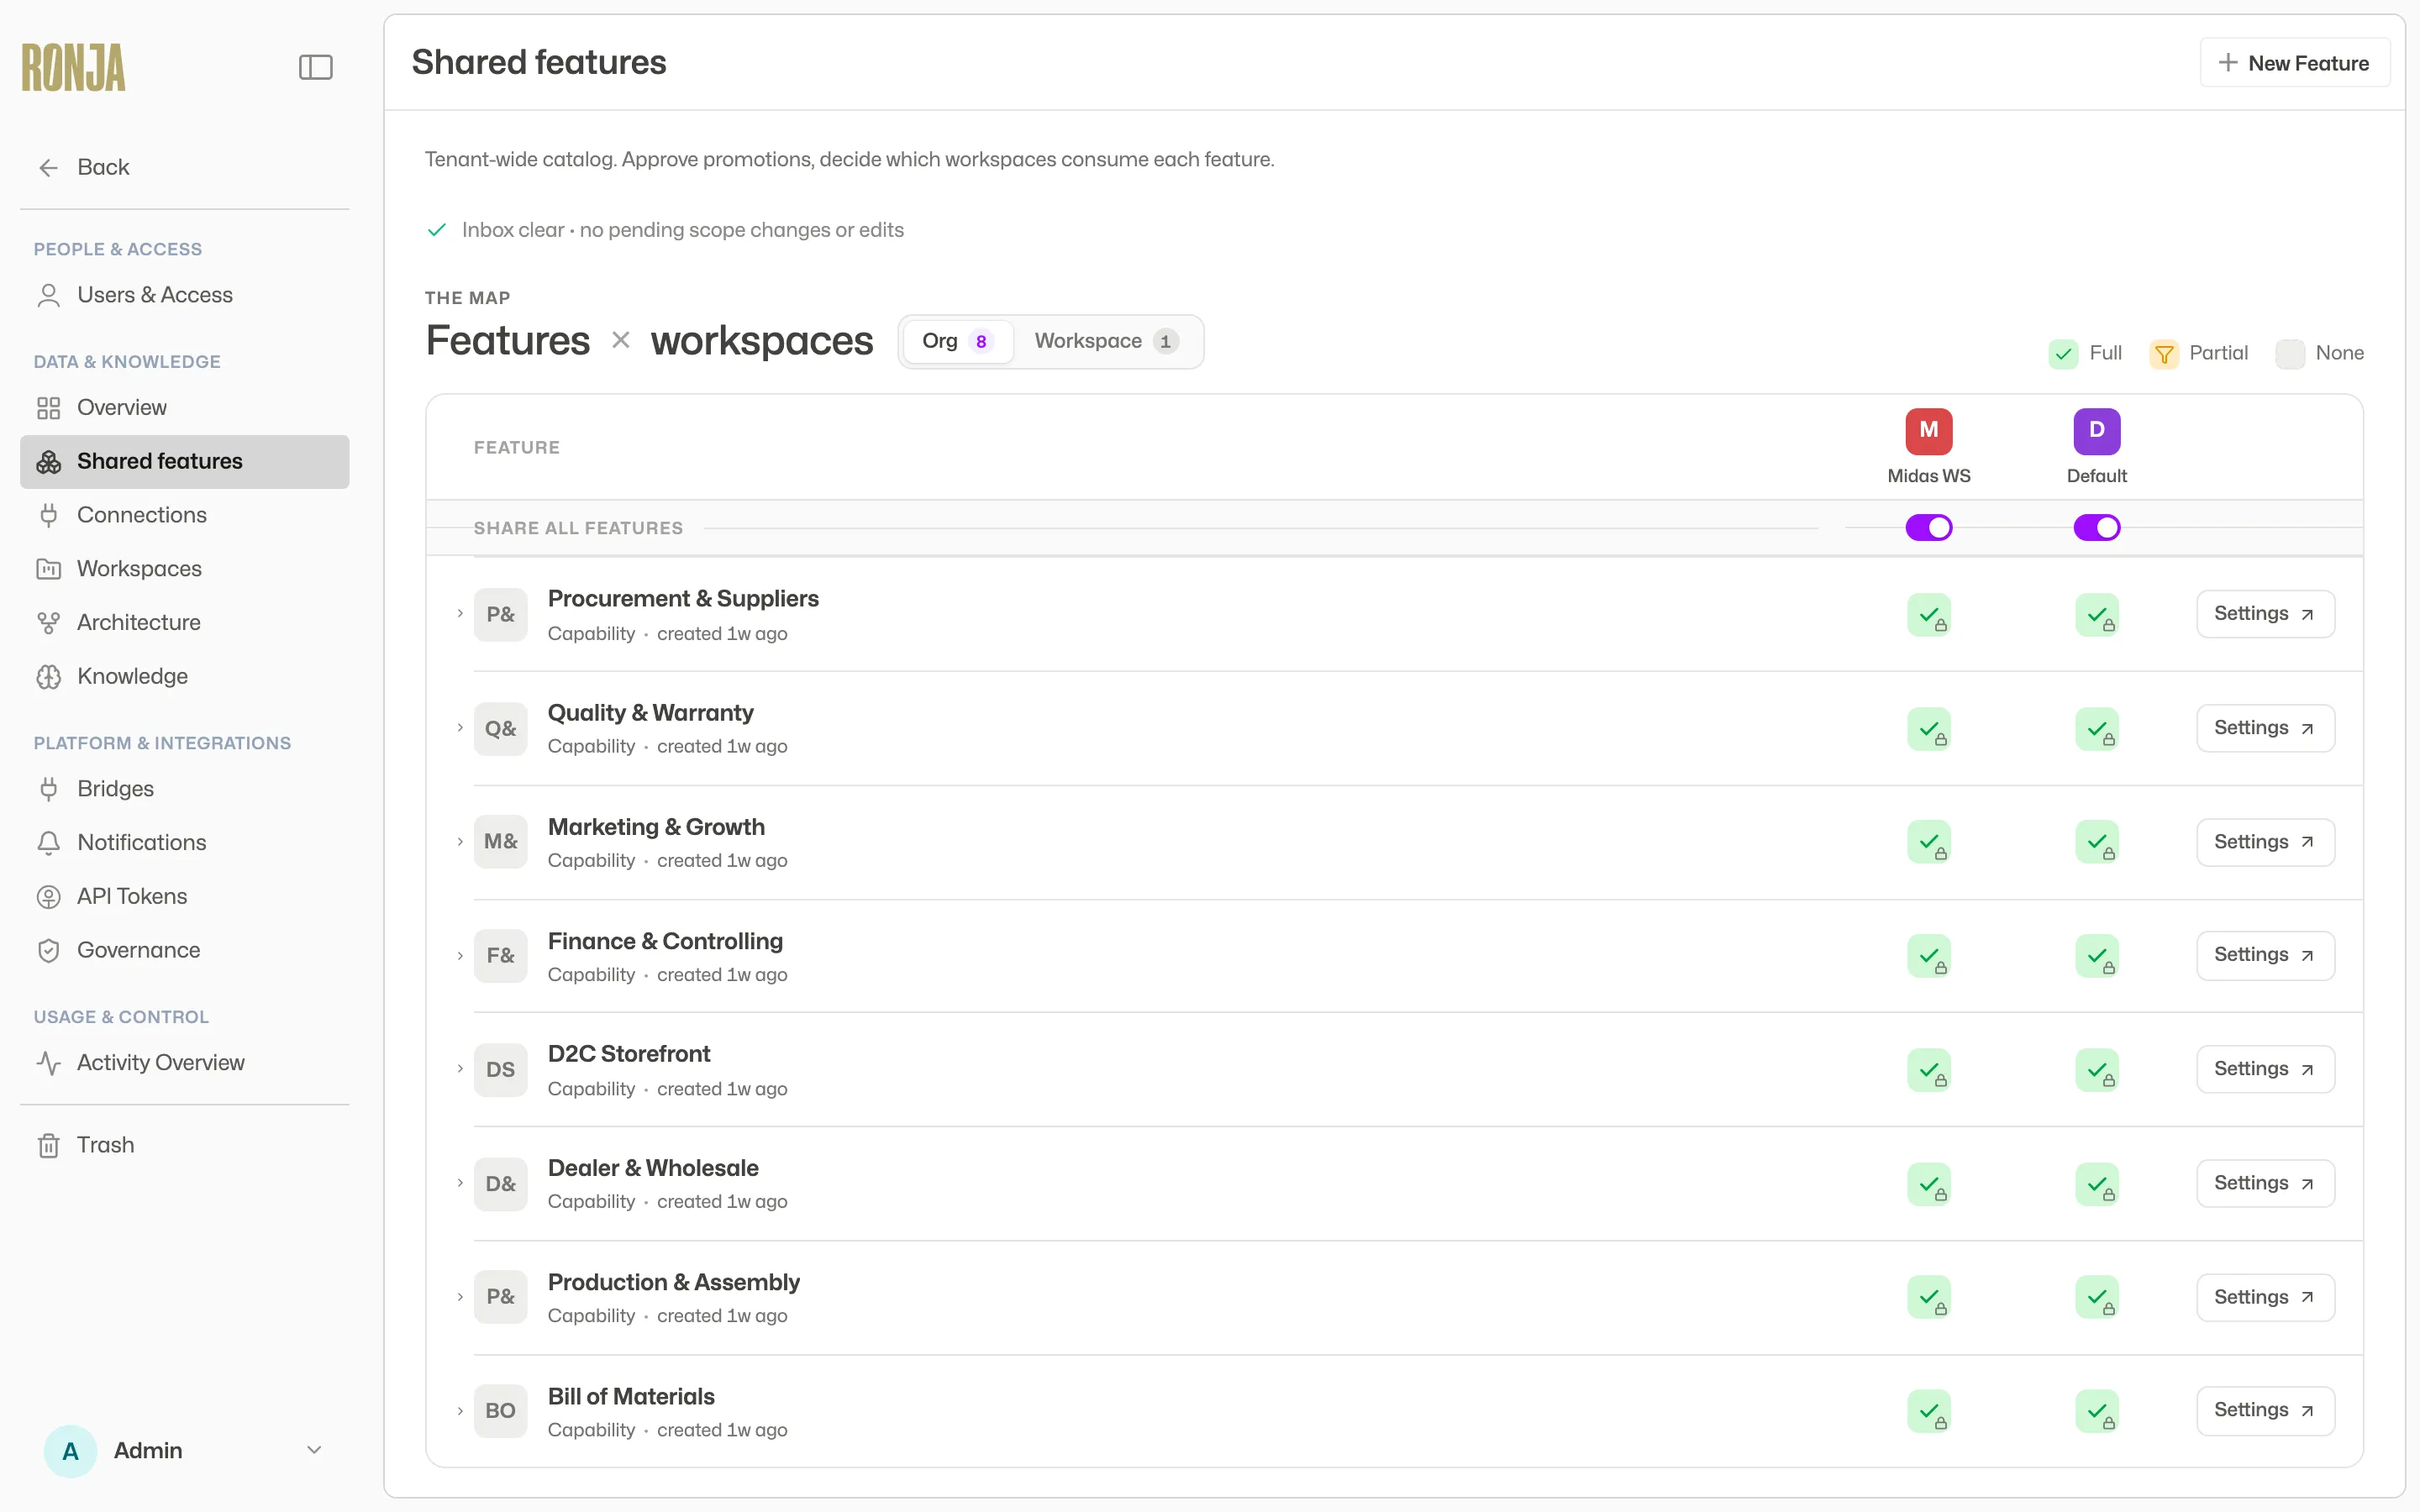 Inspect a feature and access group together, then save the access you want to grant.
Optional: describe your people
Section titled “Optional: describe your people”Record facts about each person, such as their region or job role, on People properties, next to Users & Access in the admin sidebar. Ronja then knows who she is talking to, and apps can tailor themselves to the person looking at them. If your directory is in Microsoft Entra ID or Google Workspace, Import from file brings it in from a user export. See People properties.
Optional: automatic joining by email domain
Section titled “Optional: automatic joining by email domain”If you’re the Super Admin, you can register the email domain of your own login on the Organization page so anyone who logs in with it joins your organization automatically, at a default role you choose. See Organization settings.
Ronja staff in your organization
Section titled “Ronja staff in your organization”A member of the Ronja team can join your organization to help, for example while you are getting started. They add themselves as Super Admin, give a reason, and show on Users & Access with a Ronja staff chip. Your own Super Admins and Admins (Ronja staff are left out) each get a notification in Ronja when they do, naming them and their reason, and are emailed too unless an admin has sent that email (or Slack message) elsewhere or switched it off on Notification routing. Any Admin can take them out again with Remove from organization — but that does not stop them adding themselves later, and you are notified every time they do. See Ronja staff in your organization.
Next step
Section titled “Next step”Your team is in. Point everyone at Your first conversation, then browse where to go next for reading paths by role.