
Connect your data
Ronja can’t answer questions about data it can’t see. There are two easy ways in: upload a file for instant answers, or ask Ronja to connect a live source that syncs on a schedule.
The fastest path: upload a file
Section titled “The fastest path: upload a file”- From the home page, click the + button in the chat composer, pick File, and choose your files — or drag them onto the composer, which shows an overlay reading “Drop files to attach”. You can also paste a screenshot or image straight into the box.
- Attach up to 50 files at a time. CSV, Excel, PDF, images, JSON, and most text formats are accepted.
- Each file uploads as soon as you attach it and appears as a chip above the box, with an × to remove it.
- Type your question if you have one, then press Enter — or click the button labeled “Start chat” at the bottom right of the box, which is how you send when you have only attached files and typed nothing. Ronja creates a fresh exploration (“Opening chat…”) and opens it with your files attached — start asking questions right away.
Inside an existing conversation, use the + attach menu and pick File, or simply drag files onto the chat. Size limits apply per file: images up to 20 MB, documents up to 100 MB, plain-text files up to 5 MB.
Connect a live source: just ask
Section titled “Connect a live source: just ask”For anything beyond a one-off file, tell Ronja what you want to connect — in any exploration, in your own words: “Connect our Gmail”, “Connect HubSpot”.
- Ronja figures out the right route and posts a connect card in the chat — for example “Connect Gmail (Read)” with a Sign in with Google button.
- Check the permissions, if the service offers a choice. Some cards show a Permissions to request list above the button, with everything ticked; untick anything you would rather not grant. See Manage secrets for what the locked permission and the write warning mean.
- Click the button. A popup opens with the provider’s own consent screen; the card shows “Waiting for authorization…”.
- Approve access with the provider. The card flips to a green connected state — “Gmail (Read) connected” — and Ronja automatically continues with the next step.
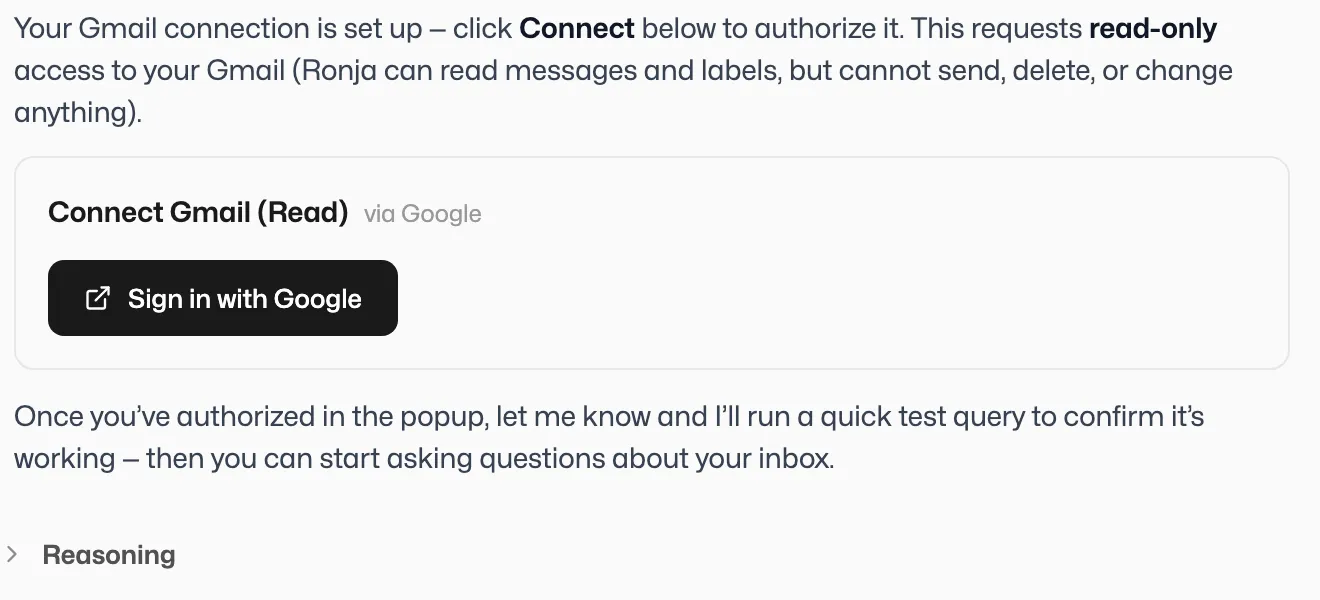 One-click sources connect through a card in the chat — sign in with the provider and Ronja carries on.
Ronja supports 8 native sync connectors, 28 one-click OAuth services, and 8 database dialects — and can work with effectively any HTTP API beyond those. Just ask, and it picks the right path. Your tokens are handled outside the conversation: the AI never sees them.
Connect a database
Section titled “Connect a database”Databases work the same way, with a secure form instead of a sign-in popup:
- Ask Ronja to connect your database — “connect our Postgres”. Ronja only reads from your database, so connect a read-only account (see the read-only account note).
- The conversation pauses and a secure credentials card labeled “Credentials required” opens just above the message box, with fields for Host, Port, Database, Username, Password, and SSL mode.
- Fill it in and click Save credentials. The values are stored as a secret — they are never shown to the AI, and never displayed anywhere in the product again — and Ronja resumes the same conversation right where she paused.
- Ronja can now query the database directly to answer your questions, and can materialize results into tables.
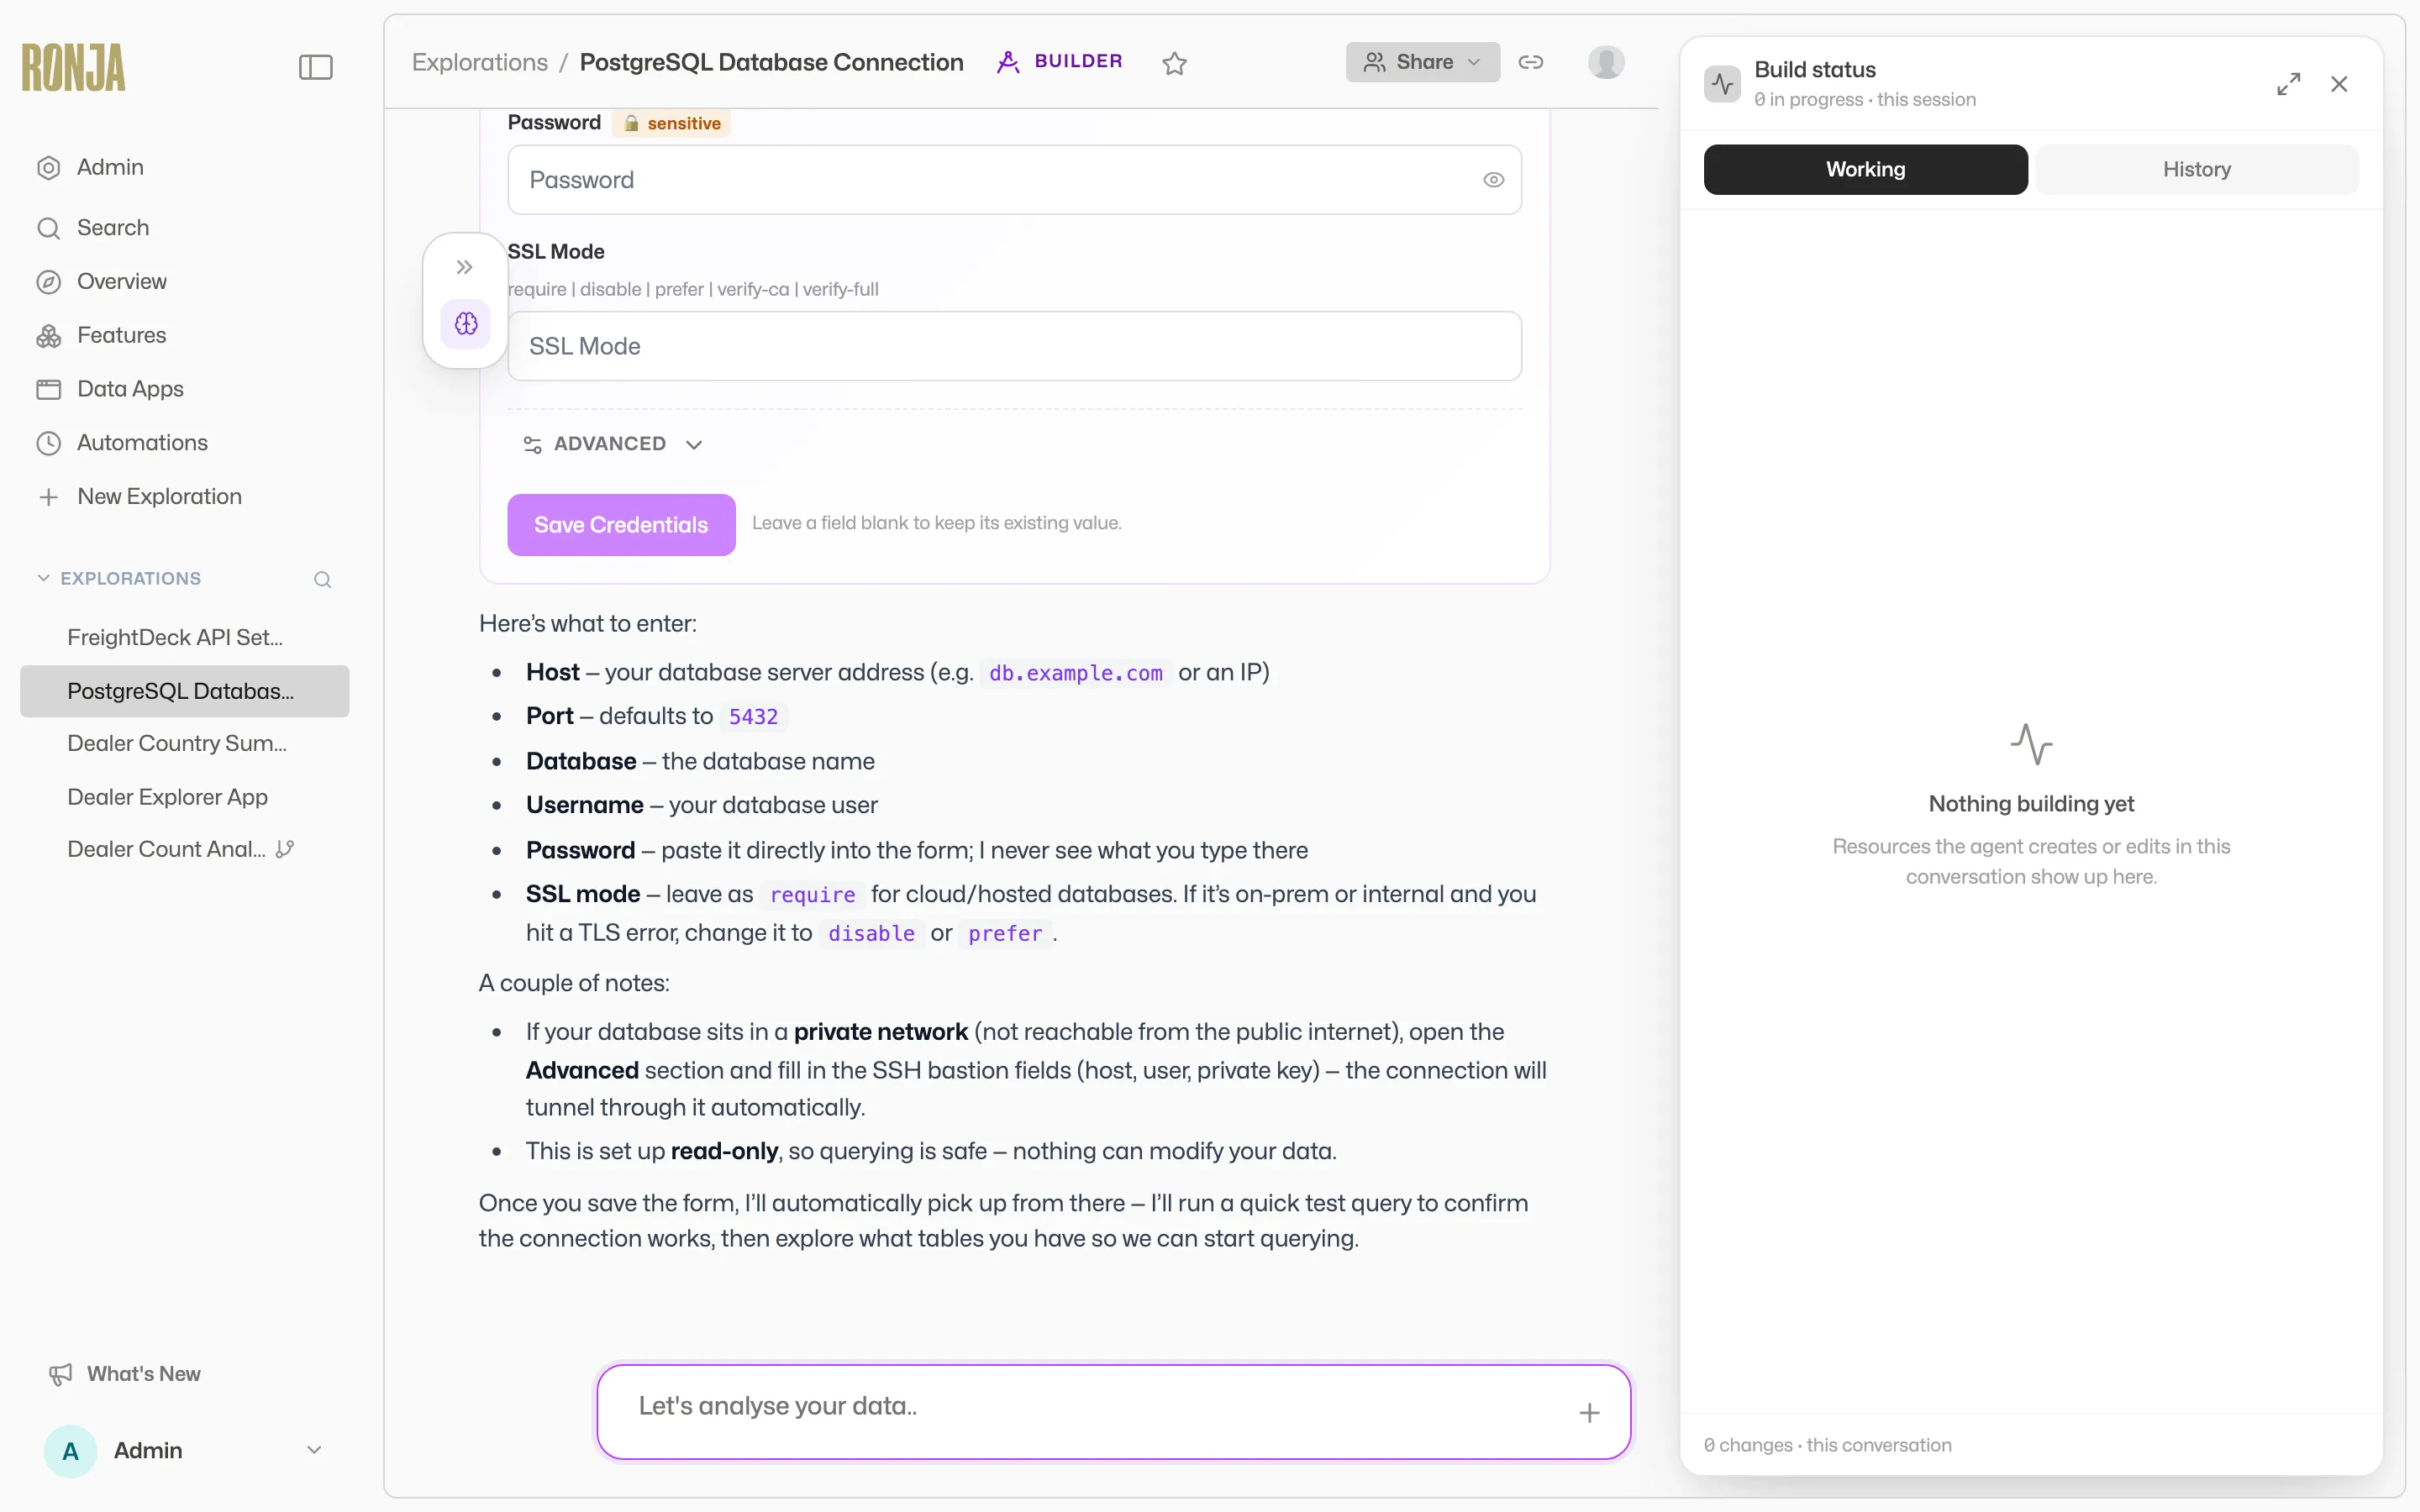 Credentials go into a secure form, straight into a secret — never through the AI.
If you’re an Admin and want the data imported on a schedule, ask Ronja — it creates a connection under a feature, where you choose which tables to import and start the sync.
Where the data lands
Section titled “Where the data lands”A connection lives inside a feature, and that’s where its tables appear. On a new connection’s page you’ll see: “Select a schema and configure tables to start syncing. No data will be fetched until at least one table is selected.” Pick your tables, then click Sync.
Two things worth knowing from day one:
- Sync Schedule — each connection syncs on an interval or a cron schedule, at most once per hour. Change it on the connection page and click Save Schedule.
- Re-authorization — if a source’s authorization expires, the connection shows a “Re-auth needed” badge. Click Re-authorize to sign in again and resume syncing.
For the full end-to-end walkthrough — including the admin Connections page, which opens the same connect-in-chat flow — see Connect a data source.
Next step
Section titled “Next step”You have data and answers. Now learn how to keep the good ones: from answer to asset.